Contents
 I was blown away when I saw the gold gilded marbled ring holders from A Beautiful Mess. It was elegant yet so simple to make. So my crafty brain started churning out ideas, and before I knew it, I had pages and pages of sketches for my very own jewelry holders. (And this was way before I even bought any clay)
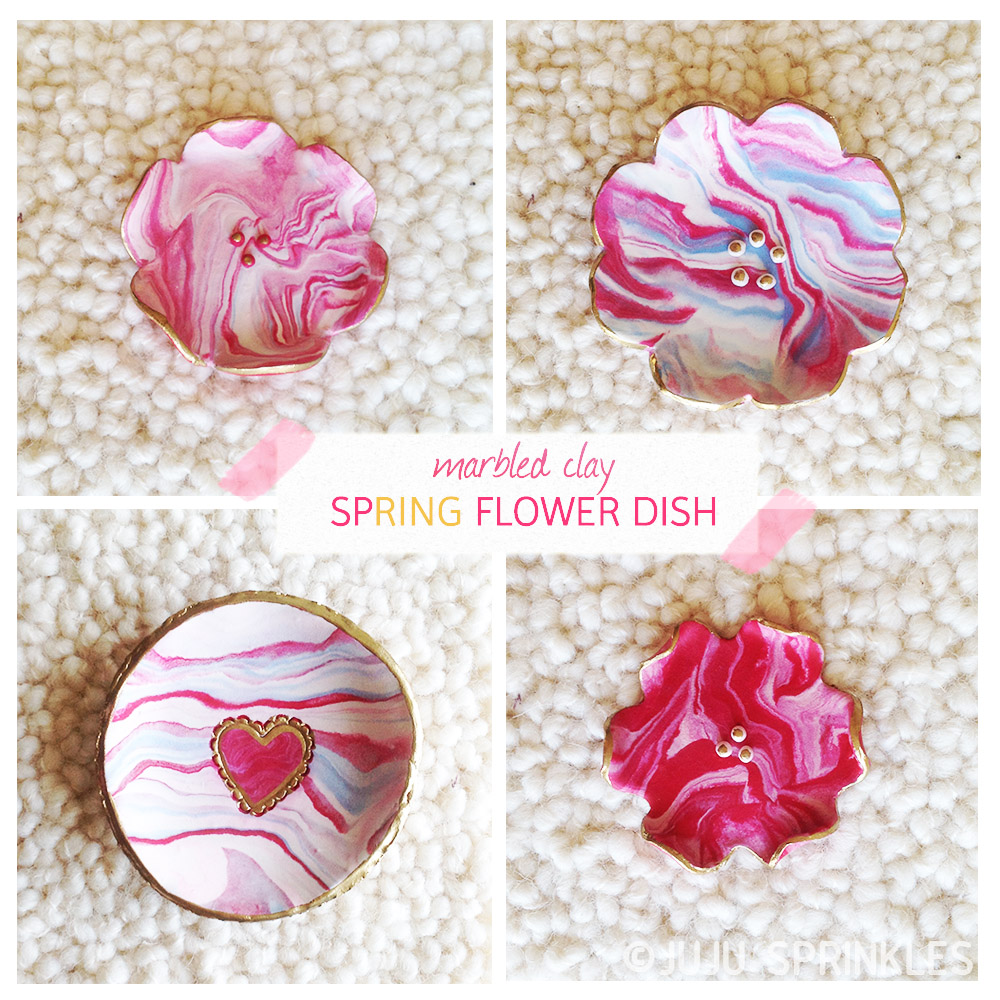
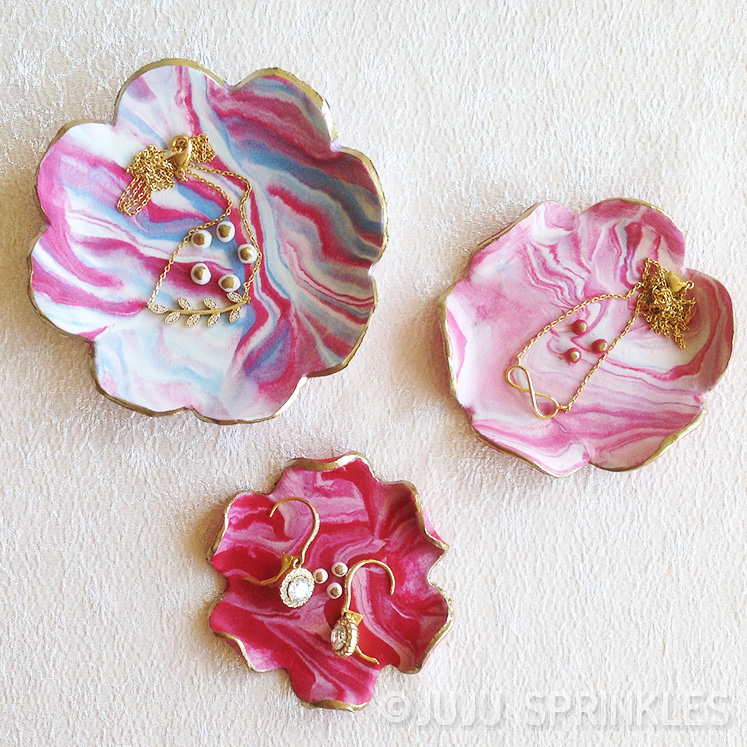
After numerous iterations, I finally settled for a spring inspired design using spring colors and floral shapes.
 As this was the second clay project in my life (the first was my wedding topper), I was a little intimidated about handling clay. But after making this dish, I can confidently say that, anyone can do it.
One of the critical factors was the type of clay. I used oven-bake Sculpey brand which was very pliable and didn’t dry out until you baked it. My wedding topper was air-dry clay which hardened super-fast. I thought I was taking an exam while working on it. (Will share photos of it soon)
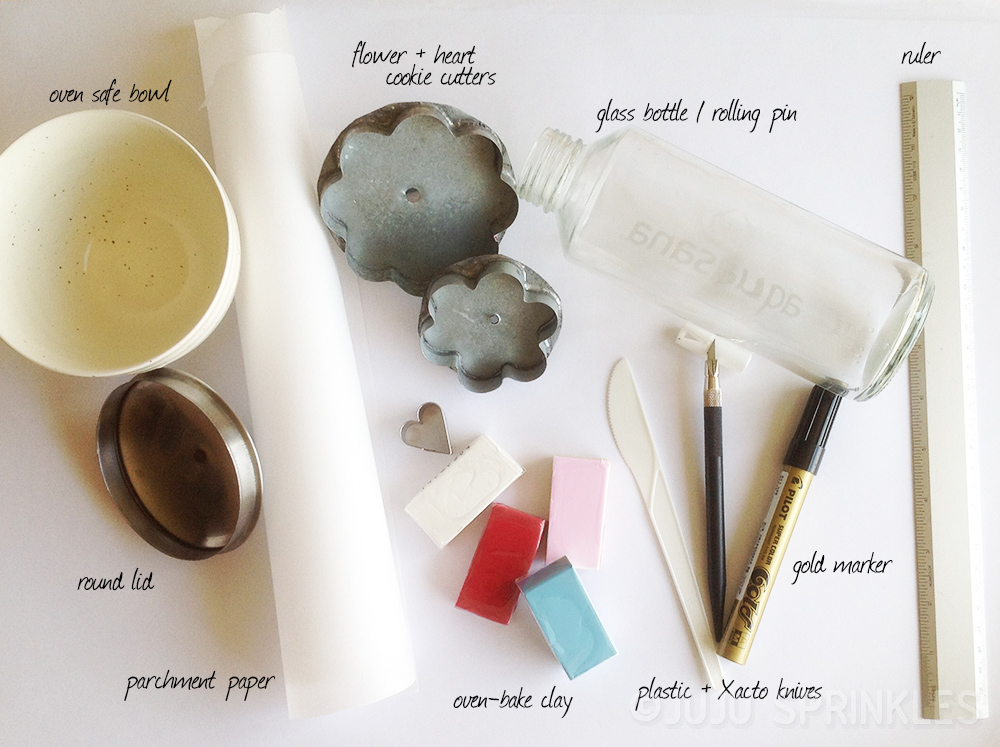 Once you have your clay, I suggest setting up your work area first so you won’t need to run around later looking for tools with your sticky clay hands.
For clay molding or stamping tools, I looked for things I have at home. Cookie cutters, plastic knife and forks, hairpin, empty glass bottle, plastic wrap, ziplock bags, toothpicks and plastic lids are all excellent tools to use. But make sure if you are reusing them for cooking, you wash them very thoroughly.
If you are planning to make multiple dishes, be aware that the darker colors can stain your hands and tools. So I would recommend working with lighter colors first and cleaning off the colors on the tools and work surface before moving onto the next color combination. And always roll your clay between two sheets of parchment paper!
Marbled Clay Sp’RING’ Flower Dish
Level: ● ● ○ ○ ○ (easy to hard)
Total Time: 2 hours, plus cooling
Supplies : (for 3-4 dishes depending on size)
- white oven bake clay (less than 2 ounces used, but I bought Sculpey polymer clay 1.75 lb
)
- red, blue and pink oven bake clay (I used Sculpey New Red
, Light Blue Pearl
, Ballerina
, less than one ounce per color is used. I bought Sculpey III multicolor sampler
.)
- small bowl or baking ramekin that is oven safe
- rolling pin or large glass jar/bottle
- ruler
- round lid to cut out shape or X-Acto knife
- flower shaped cookie cutters (optional, around 4” diameter)
- heart shaped cookie cutter (optional, around 1-1/2”)
- parchment paper for covering work surface and rolling clay
- gold paint marker
OR gold liquid gilding
- ziploc bag for leftover clay
- glaze
Instructions:


- Roll white clay into a log about 12″ long, make 2 logs, about 1/2 ounce each.
- Roll colored clay into a log about 6″ long.
- Twist together the logs and roll into one large log.
- Fold the log in half and twist again to achieve a candy cane look. You can repeat this step again for finer candy cane stripes.
- Form the twist into a ball and place it between two sheets of parchment paper for rolling.
- Flatten the ball and roll out using a rolling pin or glass bottle. Roll out in different directions to make a flattened disk, about 1/4”-1/8” thick.
- Stamp out a circle using a plastic lid, or cut out a circle with an X-Acto knife using a round lid as reference. If you have a preferred cookie cutter, use that.
- Additional steps below for 8a. Flower-shaped dish / 8b. Heart centered dish
- Place the cut out carefully into an oven-safe bowl or ramekin*
- Bake the dish according to the temperature on the clay package (Sculpey was 15 minutes at 275°F).
- Let the clay cool completely before removing from the bowl to ensure the dipped shape has solidified
- Paint the rim of the dish and allow the paint to dry. You can then seal the dish with a glaze for a glossy finish. I like it not stained because the matt finish brings out the gold accents.
8a. Flower-shaped dish


- Make stamen by forming little balls the size of a grain of rice (3-5 grains per flower). Gently place them on the center of the flower and push down slightly so they are attached.
- Fold each petal upward or curl in to create an organic look
8b. Heart centered dish
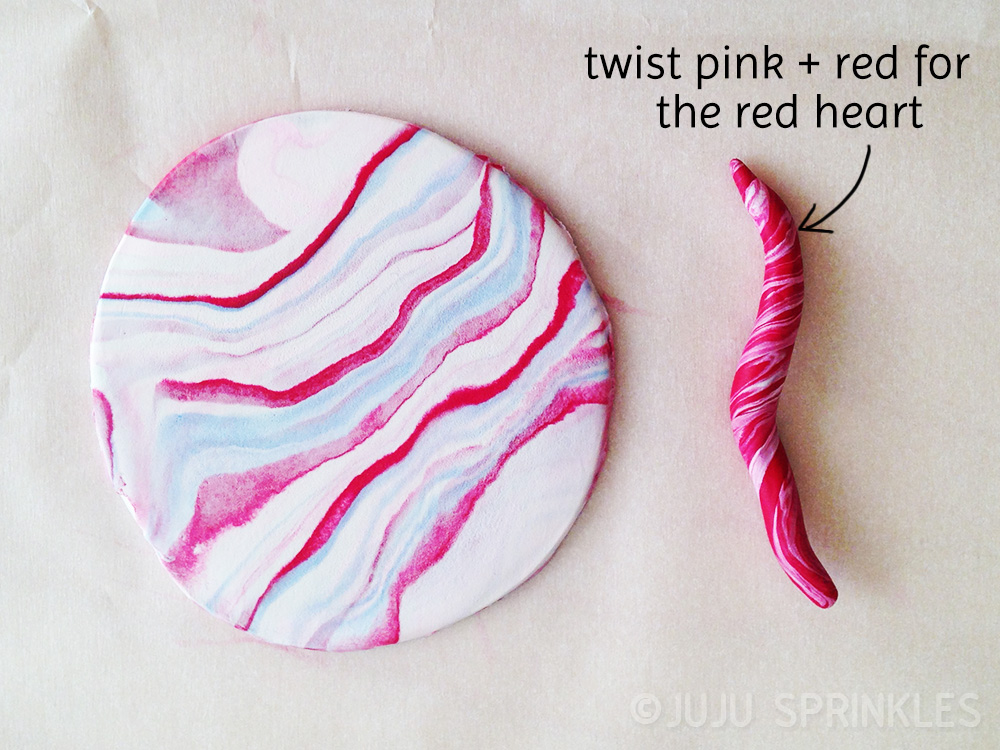


- Make a small twist of pink and red rolls (ratio 1:4). Roll into a ball and flatten to the same thickness as the dish circle.
- Cut out a heart in the center of the dish circle.
- Cut out a red heart and insert it into the dish circle.
- Gently smooth the edges so the red heart is firmly attached to the circle.
- If you like the scalloped trim around the heart, simply use the back of a hairpin and score half circles around the perimeter of the heart.
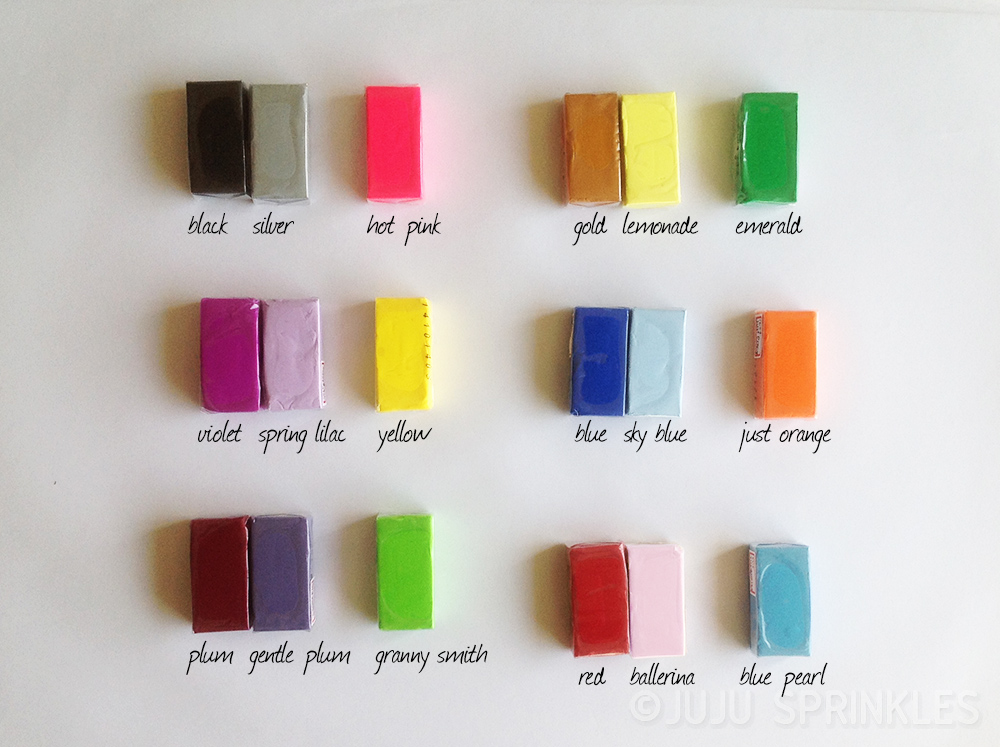
After the clay finished baking, the clay colors lightened slightly, so using darker colors would achieve a stronger marbled look. While there are many color combinations, I suggest picking 2 contrasting bold colors first (ie. blue and orange), then pick a third color that is duller than one the 2 bold colors (ie. either sky blue or peach). I put together an array of color combinations that would be lovely for this project for your reference! These colors are all available in the multicolor sampler pack.